Showing posts with label Grade 1. Show all posts

Thursday, June 7, 2012

Probability in Pictures

My Literacy Coach and I took a few teachers to visit a demonstration classroom recently, and although we were there to see Rakel's literacy program I couldn't help but take a peek at the math in her room as well. 

Her Grade 1 class is working on probability.  As we know, it's pretty simple in Grade 1 and the focus is more on the understanding of the likelihood of events occuring.  Because her language program is so rich, it allows for her students to be more successful in their written communication in math class. 

Here is her anchor chart as the centre of the work that they are doing around probability.  She has a definition of probability, and then you can see her minds-on activity under that.  She asked the students what would happen they tossed a coin in the air.


For the action, the students set to work showing examples of events that Always Happen, Sometimes Happen and Never Happen.  It is organized nicely by using magnetic clips to hold up the students work.


This is a great activity for students to do to help them understand a little bit more about probability.  Thank you for opening up your classroom to us Rakel!

Thursday, April 12, 2012

Co-Planning, Co-Producing

Carm and Jan invited me in to co-teach with them a lesson on area using non-standard units.  Carm teaches Grade 1 and Jan teaches a combined Grade 1/2 class.  Jan and I met to plan first and decided to use an idea from the curriculum document as the action part of our lesson.  We made it a parallel task so that there was a slight difference between what the Grade 1 and Grade 2 students did.  This was done to meet the needs of the two different curriculum expectations.  When Carm and I met to plan she had already seen the lesson from Jan and we decided to use the same lesson for her Grade 1s.

Here are the learning goals that the two of them had created for area:


Minds On:  The students used large sheets of construction paper to help measure the area of the learning carpet.  Before they began, they were reminded of what estimate meant and several students took turns sharing their estimates:


When they were done estimating, they found the area and shared how they came up with their answer.  This was recorded on the bottom of our chart.  You can see that the students shared 4 different ways of counting the sheets of paper to find the area.  Great examples of how they applied what they already knew to this task.

Action: 


The students quickly went to work using square of paper to help them measure the area of the op of their desk (The paper was super cheap:  550 sheets for $1.25 at Dollarama)


The students then had a picture of their desks taken, and then they used this picture to help them complete their answer.  We saw that the students used the strategies that we talked about to help them show how they counted up to 48 to get their final answer. 

Consolidate:  The students talked about how they got their answers with a partner.

We had two great lessons in two great classes!  The students were engaged and really able to demonstrate a lot of prior knowledge when solving this task.

Get An Idea and Run With It

Ellen was on the wiki and came across the lesson that was done in Zarha's class as part of our lesson study.  Since she teaches Grade 1, she decided to try the lesson herself.  She made a few modifications to it so it would work with the needs of the students in her class.  Here is her lesson:

Minds-On:  She had the students use ice cream cones and scoops of ice cream as a way to see the different ways that they could make combinations of chocolate and vanilla ice cream.


Action:  The students then came up with different ways that they could arrange different coloured candles on the cake. 


Consolidation:  The students then talked about what they noticed and came up with some good understanding of ways they could make 8.  Ellen also had them reflect on what their next step's would be and recorded them as well.  This is a great way to help bring in success criteria with Grade 1 students as it helps them come up with their own ideas of what makes a good answer, and it lets them reflect on the discussion about what they saw that made a good answer.


Ellen said that the activity allowed her to see different things about her students.  She was surprised when some students responded (and responded correctly) because they are not always the most confident or able in math.  She did say that this activity took her longer than expected.  I'm confident that as Ellen does more activities like this in the class, her students will get stronger and better at them.

Here is a full shot of what the lesson looked like when it was completed and hanging proudly out in the hall:


Saturday, February 25, 2012

Great Idea For Teaching Money

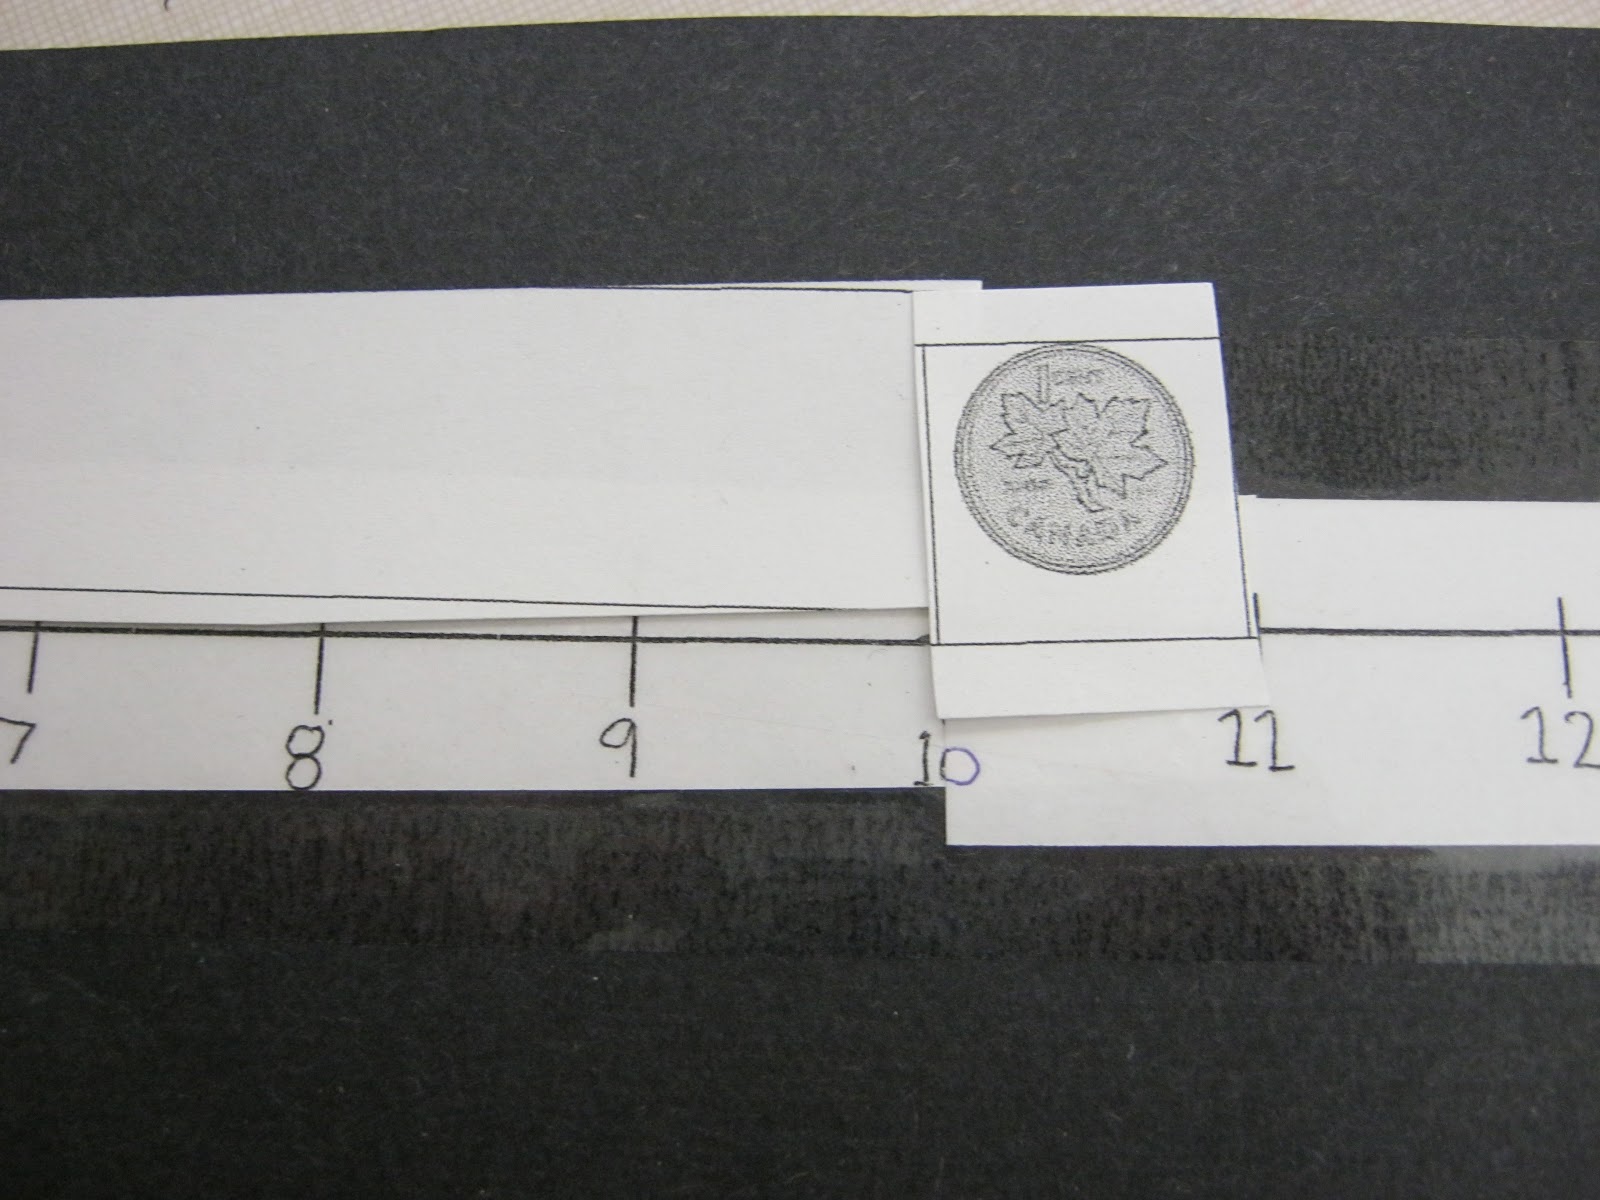
Haroula is about to teach her Grade 1 students about how to add coins together.  She has found from past experience that sometimes the students have a hard time understanding that a coin that is smaller than a penny (a dime) is worth more than the penny.  So she created a number line system where the value of the coin (e.g, a dime) will go for exactly 10 spaces.  Therefore as the students line the coins up on the number line, it will tell them what the final total is.  Here are pictures of her great idea:

This is what the number line looks like.

An up close view of the first few numbers.

The picture of the dime goes ten spots on the number line.

The penny goes one spot - A dime + a penny = 11 cents.  It ends at 11 on the number line.

She used real clip art images for the coins and then used the paper cutter to cut out the coins.
This idea might seem a little time consuming, but once you have done it, I think it will help save you a lot of time teaching the concept of adding and subtracting money amounts.  I will put the template up on the FOS Wiki.  Thank you to Haroula for sharing this great idea!

Wednesday, December 7, 2011

Asking Questions About Graphs

Haroula's Grade 1 math class is near the end of their unit on graphing.  She wanted to give them a culminating task that would not only have them create a graph, but also create questions about the data in front of them.

Each student choose a question to ask their peers.  They then went around and surveyed each student in the class and recorded the answer in a tally.  She kept things pretty simple by suggesting that there be no more than four options (answers) to choose from.  The students then created a graph based on the data they collected.

Haroula then had the students exchange completed graphs.  The students then had to ask two questions based on the new graph in front of them. (On the yellow paper) The author of the graph then had to answer the question that was asked of them. (On the orange paper).  When the questions were asked and answered, she put the graphs and the questions on display for everyone to see.  She included a description of the activity (procedure) as well as the curriculum expectations that were covered in doing the activity.  It's great to see not only the completed graphs but also the questions that were asked about each graph.

The Finished Product

Close Up Of The Description Of The Activity.
 

Wednesday, November 16, 2011

Graphing In Grade One

Ellen's Grade 1 class is starting their unit on Data Management.  She choose a lesson from the Guide to Effective Instruction as part of her unit.  Using the three-part lesson template she re-worked the lesson to meet the needs of her class.

For her Minds On she had the students complete a graph as a class about what their favourite type of recess snack was.  At the top of her graph she included a class list.  She used this class list as a way to show her students how to keep track of who had already given their answer.  She also drew a picture beside the different choices to help her students use a picture to help them figure out what the word was.  Once all of the names were crossed off, the students then started sharing what they noticed about their graph.  You can see the nuggets of what they discovered written right on the graph.


For the Action part of the lesson the students brainstormed several questions that they could ask each other about what their favourite things could be.  The questions were recorded in one colour and the possible categories (or answers) were recorded in another colour.  The students then went to work choosing their question from this list or from their own idea, and then began surveying their friends.
The students were each given a copy of the graph template and a clipboard.  On the back of the sheet, Ellen photocopied a class list so all the students needed to do was to flip over the sheet and cross off the name of their friend who they had just asked.  This was an easy way to keep track of who had and who hadn't answered the survey.
For students who struggle with printing, or were not comfortable in writing out their choices (it is early Grade 1) they drew a picture of their choice and then went on their merry way surveying their classmates.
In the final part (consolidation) of the lesson the students shared their graphs and then asked each other questions about what the data they collected said.

Monday, November 14, 2011

Baggie Games For Fun

Haroula teaches a combined Grade 1/2.  Her and her teaching partner switch off so they are able to teach a straight grade in math.  This leaves her with just the Grade 1 students.  As we know, Grade 1 students are active little beings who need to move around and need to be able to have some one-on-one time with the teacher to not only express their answers orally, but also to help them gain a better understanding of the concepts that they are being taught.

Haroula made up several different "Baggie Games" for her students to use as part of their math centres, and also for when they were "done" their work.  She finds that letting them use the games as part of her math program has helped her to get some of that much needed one-on-one time, while still reinforcing the concepts she is teaching (or has taught) in the large group.

One of the games that she has created is using Dot Cards.  She used the pictures of the Dot Cards from the Guide To Effective Instruction in Mathematics:  Number Sense and Numeration (GTEI)and then cut the pictures out.  She then taped them onto blank playing cards.  She has the students play a matching game where they have to match the same numbers together.  This helps them work on subatizing and also one-to-one correspondence.
You can see the two different ways to make a dot arrangement to show the number 6.

Here are some of the pictures of the other cards.

A second game that she made was originally in the GTEI but in the Grade 2 section.  She modified it to meet the needs of her Grade 1 students.  She also included a number line as a tool to help them not only get more comfortable with counting backwards, but also just in using the tool.
Here are the instructions she included.  (She has played the game several times in the large group and in small groups)

Here is everything that is in the baggie.

The cards are in a different colour of card stock to help make them stand out.
These games (and others like them) would be a great addition to any math program.  You could also use them as part of a family math night, and also as part of a "Math Bag" program where you would send home games for students to play at home.